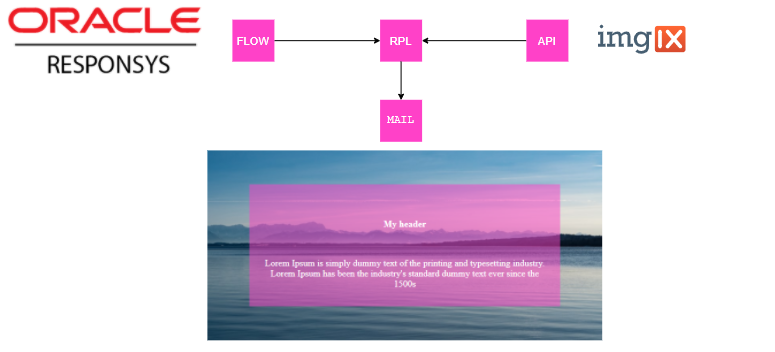
Dynamic images in Responsys using ImgIX.com
Connecting the dots
When converting design and brand to mail templates it happens that some elements can't be shown
correctly in all mail clients. You need to think out-of-the-box and this is where imgIX.com come in play.
Problematic use-case #1: Buttons with round corners.

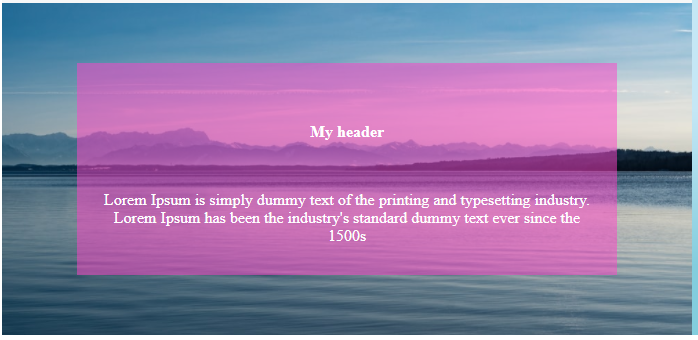
Problematic use-case #2: Images with text overlay.
Solution
These kind of challenges needs to be solved outside HTML/CSS.
One solution is to create all buttons and images in your favorite
image editor, but this is a long and slow process, when having many
styles and languages.
The best solution is to auto generate these images and one way to do this is by using imgIX.com.
"Imgix gives you a full range of creative imaging solutions, so you
can put every pixel to work impressing your customers. ImgIX transforms, optimizes, and intelligently caches your entire image library for fast websites and apps using simple and robust URL parameters."
imgIX.com
So how did we do that?
The first thing to do, is to try and test imgIX. To figure out if your work can be done, try the sandbox
tool on imgix.com and review the documentation.
After trying the sandbox, you need to make an account in order to use this in production.
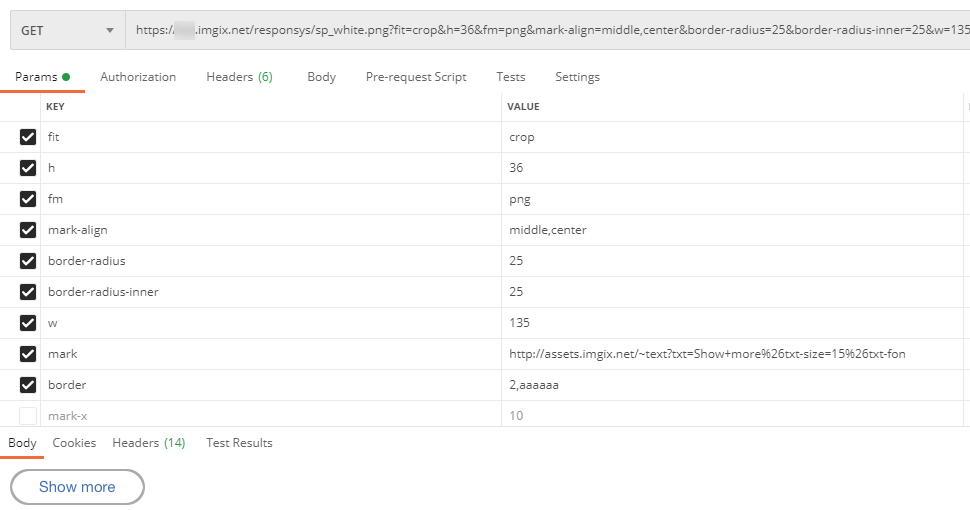
I recommend that you use Postman for further testing, because you can try different settings and test this immediately.
The output from imgIx is a very long img link like:
https://xxx.imgix.net/responsys/sp_white.png?h=36&fm=png&mark-align=middle,center&border-radius=25&border-radius-inner=25&w=135&mark=http://assets.imgix.net/~text?txt=Show+more%26txt-size=15%26txt-font=Helvetica%20Neue%26txt-color=4472B2%26txt-align=middle%2Ccenter&border=2,aaaaaa
Usage in Responsys
The link above will generate a round button with a text. With everything working in postman, we are ready to implement this in Responsys.
If you use the Email Message Designer in Responsys you could simply insert the link and you are all set.
If you have more complex platform and use advanced templating in RPL, you want to create a RPL macro. The macro can help non-technical people to insert the button when needed.
In our case we will make a macro call "buttonWhiteBlueBorder" with these parameters:
<@buttonWhiteBlueBorder width=130 height=40 text="Show more"/>
We can decide size and text for this button, and we can add more parameters later if needed.
<#macro buttonWhiteBlueBorder text width=135 height=36>


<img height="${height}" width="${width}"
src="https://XXX.imgix.net/responsys/sp_${backgroundColor}.png?w=${widthImgix}
&h=${heightImgix}&mark=http://assets.imgix.net/~text?txt=${text}%26txt-size=15%26txt-font=Helvetica%20Neue}%26txt-color=4472B2%26txt-align=middle%2Ccenter&border=2,4472B2
&border-radius=25
&border-radius-in1ner=26
&fm=png
&mark-align=middle,center">;
</#macro>
This macro has defaults variables, so "text" is the only needed. "width" will be "135" and "height" will be "36" if not used.
<@buttonWhiteBlueBorder text="Show more"/>
Usage in Responsys
The details
You probably notice that we are using a predefined background as: https://XXX.imgix.net/responsys/sp_${backgroundColor}.png
In imgIX you can setup image sources. These can be connected to your image library in AWS A3, so you can put in texts on top.