How Oracle Integration made my life easier
Building and implementing integrations between platforms is a vital business objective. Data usage has become of the biggest opportunities within the business and can level the whole experience for employees and customers. To utilize data, within different business entities, you need to connect the dots and have the various platforms talk to each other. This kind of integration is often dropped between two chairs - IT and the marketing department.
In this article we will explain why middleware, like Oracle Integration Cloud (OIC), can solve this objective. We will show a hands-on use-case, by connecting a website and Oracle Eloqua using OIC.
When should you use OIC?
OIC is a middleware enterprise product and can be used to create integrations between platforms.
Features you get in OIC:
- Integration flows
- Process automation (RPA)
- Visual builder for mobile and web apps
We cover Integration flows in this article, as #2 and #3 deserves more focus.
What to do
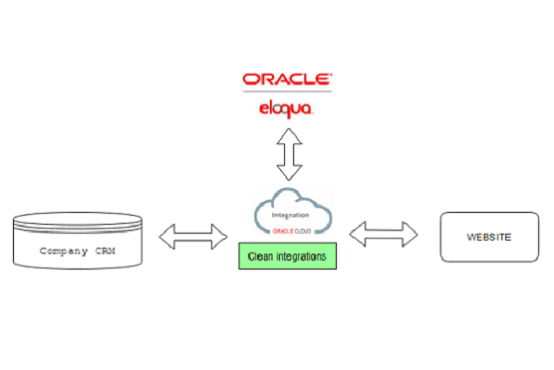
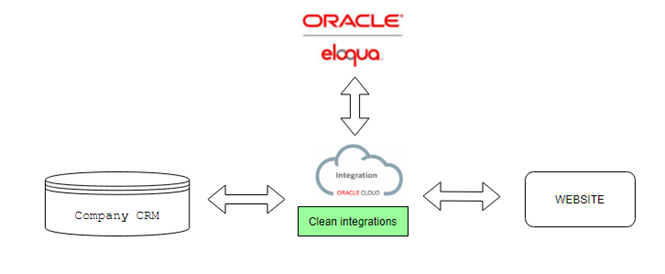
The best integration strategy is to create decoupled integrations, so any platform can be replaced. This way you are not investing time on native integrations, which might end up dictating how your data model should be. By taking this approach, you are staying in control of your data structure.
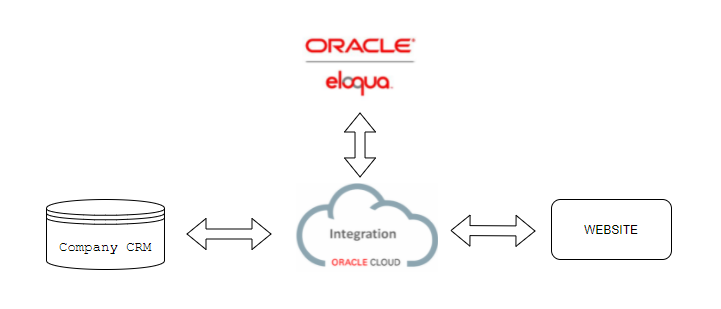
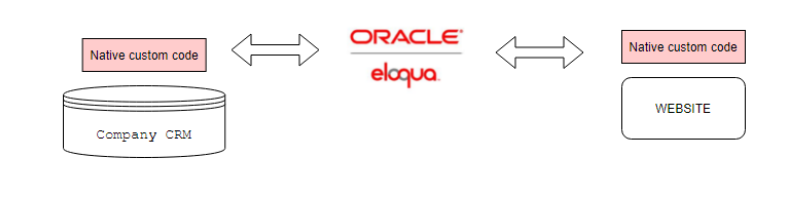
What not to do
It's very common to use Eloqua REST API directly from your source platform, but strategically this is a bad idea, as you won't be able to change platform without creating all integrations again. Without the middleware approach you will be forced to stay on the chosen platform, as it can be a costly affair to change later.
The common tasks, when taking this approach:
- Create specification for CRM team and Lead platform, on how to integrate to Eloqua
- CRM: Someone in the CRM teams must develop and transfer data to Eloqua. They need to learn Eloqua REST API, and they probably don't want to do this. This is probably an extra export feature, which will result in an extra cost
- WEB: The Web team must create and develop an integration to Eloqua, and they need to figure out how the REST API works in Eloqua. Which is an extra cost
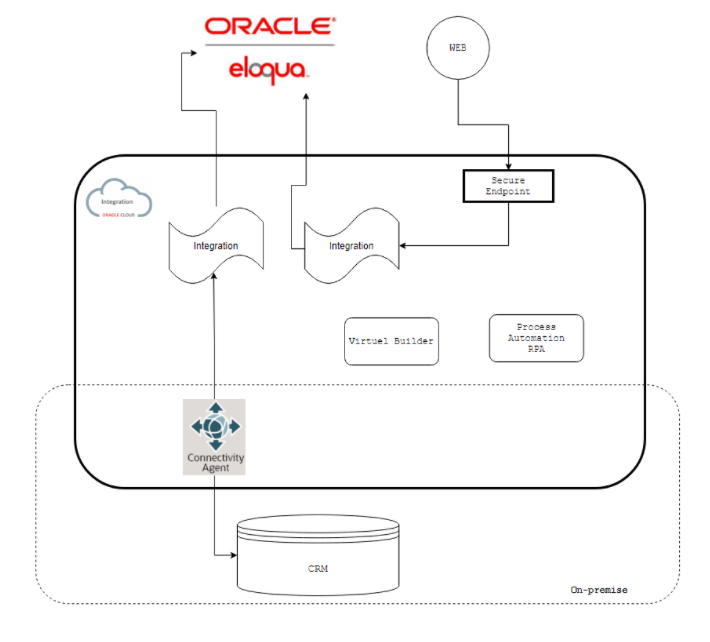
The Basics in Integration Cloud
As shown below, OIC, has the ability to add an on-premise connectivity agent. With this you can access any service available from the server, which the agent is installed on. See more on This page.
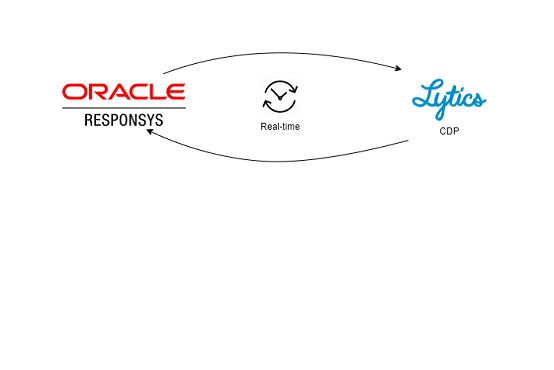
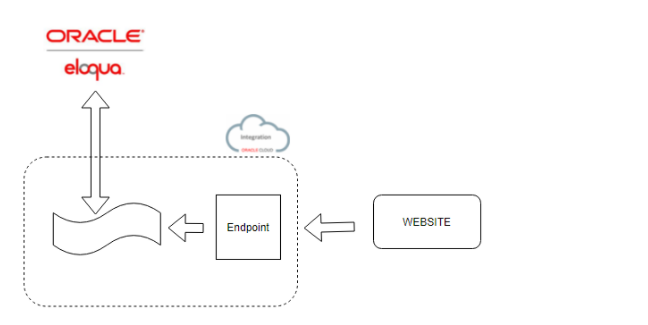
The use-case
We are connecting CRM data to Eloqua and using a company website to capture real-time leads via forms.

Creating an OIC endpoint for the website integration
The endpoint connection
To create an endpoint, which forwards data to Eloqua, you need to create a connection first. In a connection you must specify URL, protocol and security. This essentially means that you can re-use connections for your intergrations rather than remaking them each time. The images below will show the process of setting up a connection and how a finished connection looks for a simple REST API Adapter.
When creating a connection, you will be met with this pop-up form:
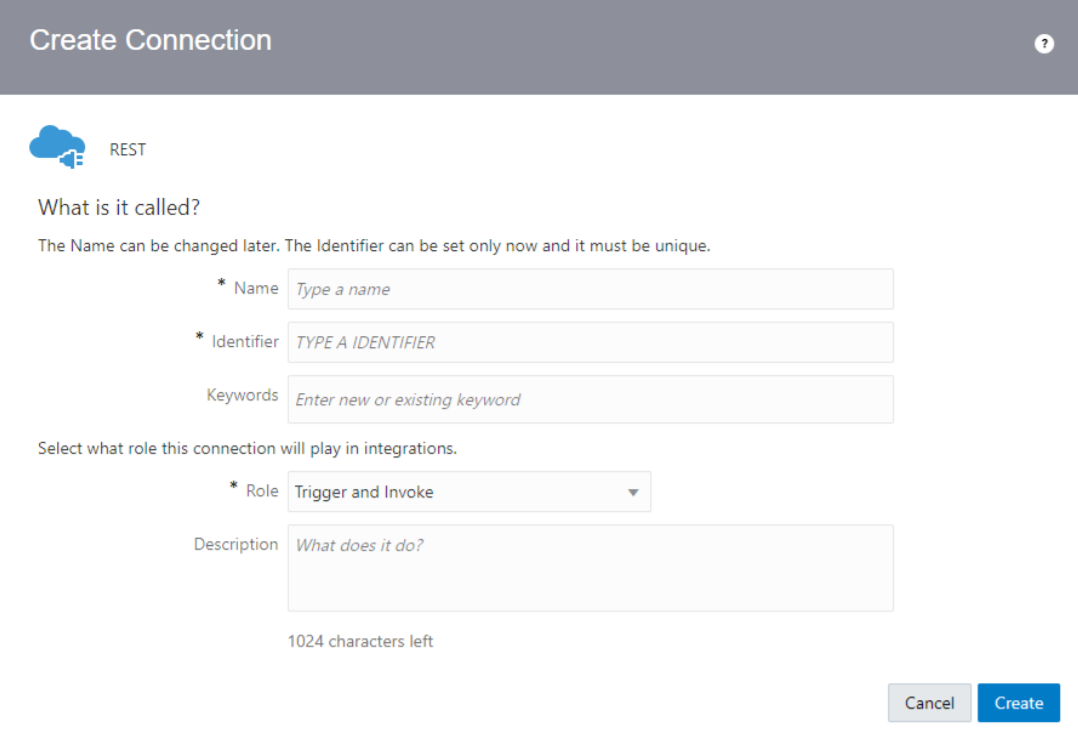
The important thing to figure out here is what the role of the connection should be, typically how a trigger and invoke role works the best. This is important because in certain situations you may only want a trigger or invoke role for the specific connection.

The next step is to configure the connection properties and authorization method:
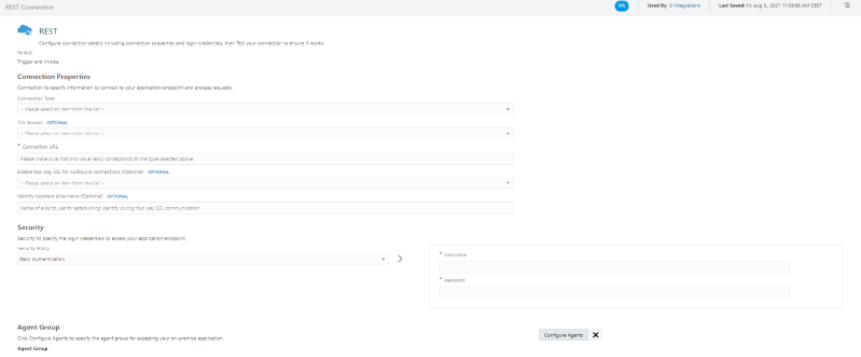
Here we can setup the connection type, the URL and the type of security the connection requires such as API tokens, basic authorization and so on.
When you have an endpoint URL, you can always use this link to access endpoint directly: http://username:password@EndpointUrl. |
|
|
When you have an endpoint URL, you can always use this link to access endpoint directly: http://username:password@EndpointUrl. |
The finished connection will look something like the below image.
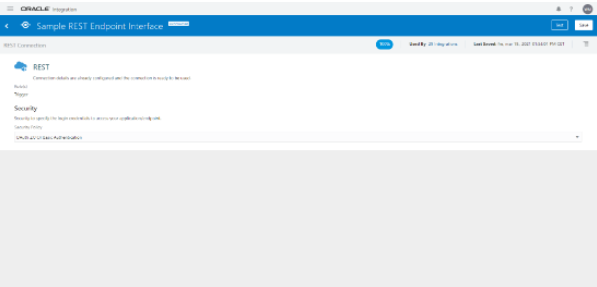
The next step is to build an integration flow with this connection.
Building the integration flow for the website
Once an integration has been created, we can add our connection to the canvas.
Once added, we need to configure the connection. In the configuration we have several options how the endpoint will function regarding headers, requests and responses. We can also specify the format these may come in, as well as specifying what type of operation needs to be carried out by the adapter. The menu seen below is for the REST API adapter, which may differ from other adapters in OIC.
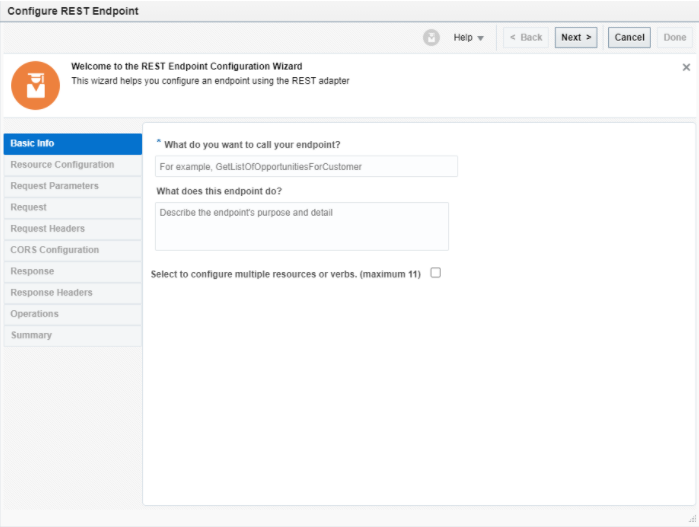
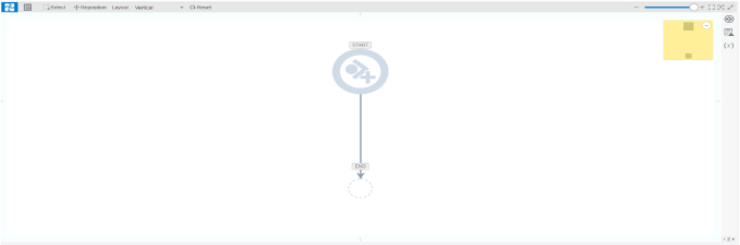
Now that we have configured the start of our flow, the flow canvas will have automatically update based on the changes to the connection configuration, see image below.
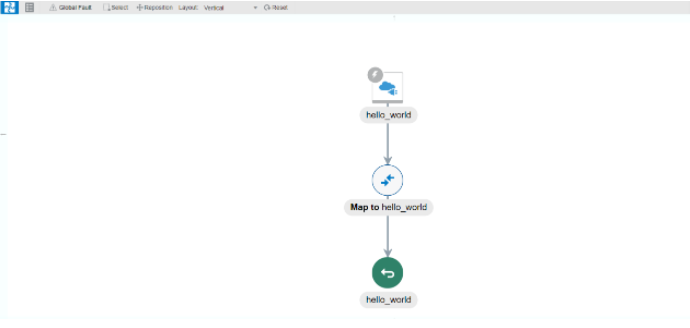
Because we have configured the endpoint to return a response, we need to configure the mapping at the end.
The mapping menu is pictured below.
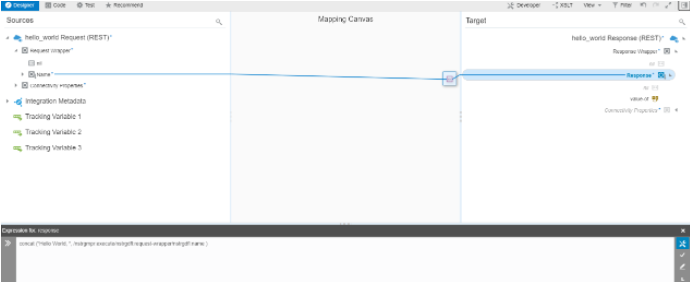
The mapping function is a powerful tool that allows us to map the data between the platforms in each step of the flow, and we can also make use of different functions to allow transformation of data if such a requirement is to be met. By validating the map, we are now ready to save the canvas flow, which will also allow us to activate the integration outside of the canvas flow designer.
This is a basic endpoint with a response. Let's continue with an Eloqua connection!
Adding connection to Eloqua
To access Eloqua in OIC, you'll first need to setup an Eloqua connection via the Eloqua adapter. Once you have done this, you'll be able to add this connection to your flow. Once added, a menu pops up in which you can configure the adapter for what you'll need it for. Based on the adapter and role, the menu will look different from each other, as the configuration is dependent on those factors.
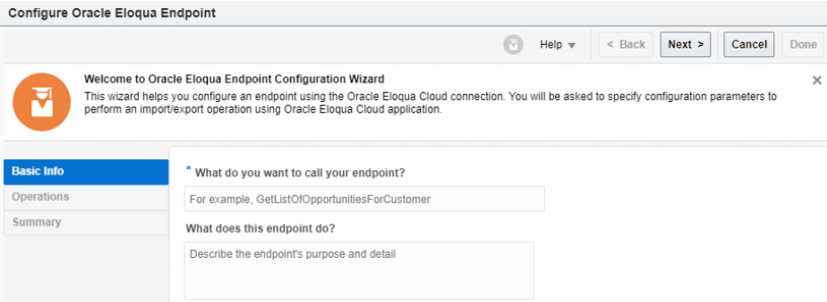
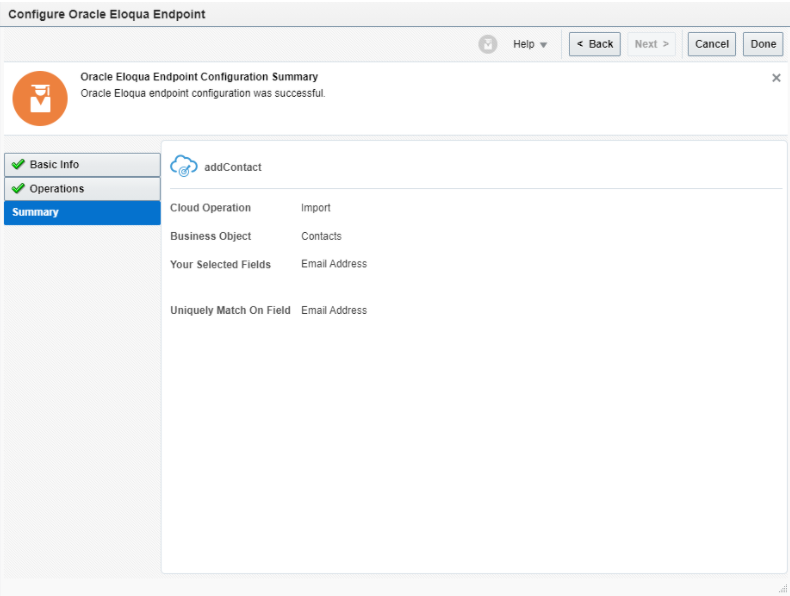
In this case the Eloqua adapter acts as an invoke role for the Eloqua connection, as it adds a new contact based on email address. Here is a summary of the configuration for the Eloqua connection endpoint.
Ok, everything should be ready for a live test!
Activating our integration
When everything is validated, the integration can be activated. To be able to activate it outside the orchestrator interface, you'll need to fix errors that are shown and then save the integration.
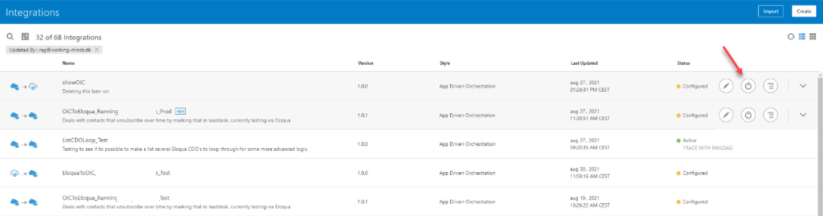
Once all errors are fixed, you can now leave the integration and see a list of your integrations. With no errors we now have the option to activate our integration:
When activating an integration, we need to configure options about debugging:
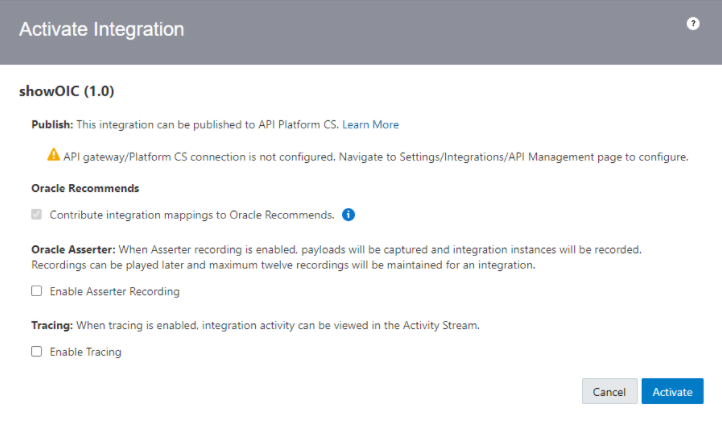
Here we can activate some additional options but the most important one is the tracing functionality, as this will make testing easier and help figure out, where there might be errors in the flow. You may also allow the trace to capture payloads. This is recommended for when you are testing but should be reconsidered when activating the production version of an integration. These payloads may contain sensitive information you may not want to be visible in the trace log.
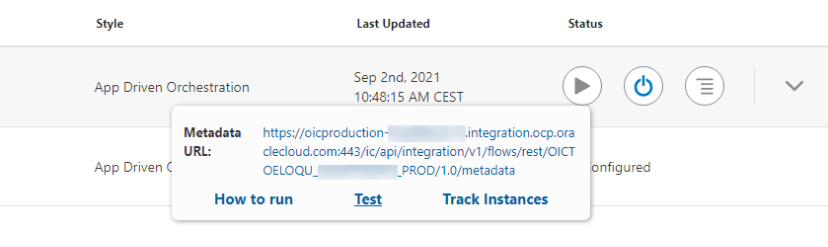
After activating you will see a "Play" button, which gives you access to "How to run", "Test", "Tracking instances".
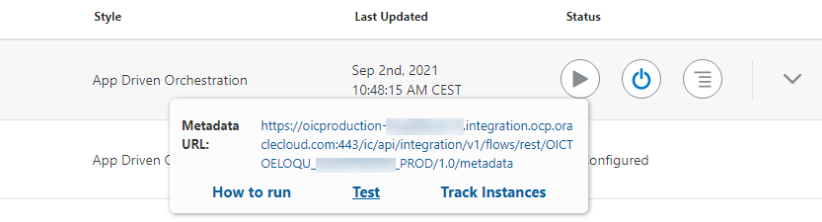
In this case we'll activate the trace log and allow the payloads in the integration to be captured. The activation process may take a few seconds to a minute to activate the integration. Once the integration is active, you can send a payload via the test interface or through the URL via Postman or other such tools.
Monitor and tracing
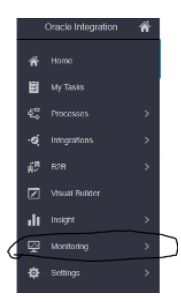 With an activated integration, you'll probably want to monitor its health and see what's going on. As of now, the integration will not have any traces nor logs as the integration will not have been used. To monitor and see the traces, we can head to the monitor page of our integration cloud instance.
Pressing the button will take us to a sub-menu in which we can go to our usage metrics, to our B2B tracking or to the integrations monitoring page. Clicking the integrations button will open another sub-menu, as seen below.
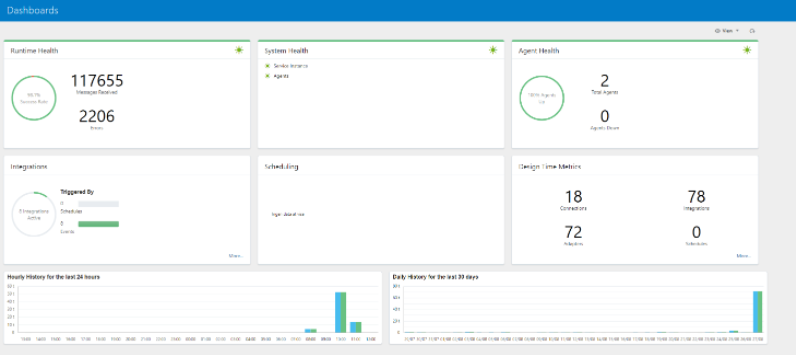
Clicking the dashboard button will give us an overview of all the integrations and the overall number of messages processed including the last 24 hours and the last month. It can look something like this:
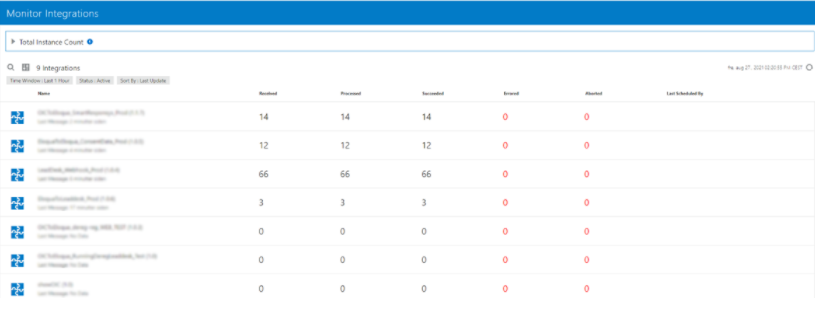
Once you have sent a message to our integration, you'll be able to click on the number of processed instances and see the instance regardless of result.
Testing and deploying new versions
We can either test it via Postman (or a similar platform) or by using the test interface in OIC.
To use the test interface, click on the "Play!" button.
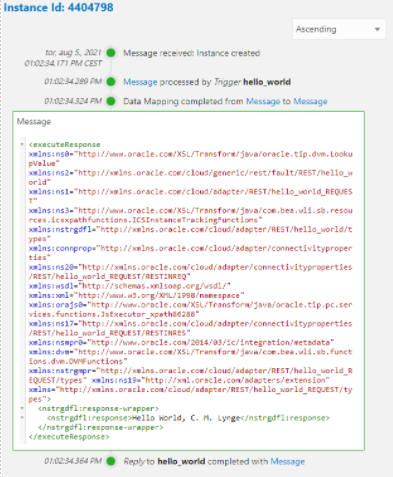
After you click on "Test", you will see a test interface:

In case of fatal errors during the processing of the flow we can track this via OIC and see the payloads, up to the point of the fatal error. For this view click on "Track instance".
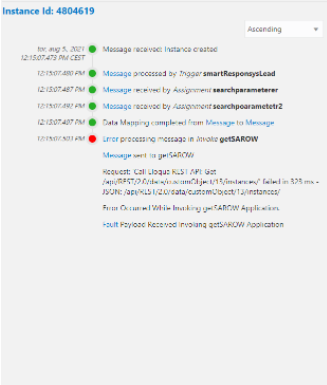
This trace indicates that at a certain point something went wrong. In this case something to do with a request call made to the Eloqua API. As a small side note before moving on, we'll delve into how scheduled integrations can be tested in OIC.
Scheduled integrations run asynchronously rather than synchronously, thus allowing us to spin up a test once the integration is activated and let it run. During this test we can investigate the trace and see what's going on over the course of the instance that currently runs in the integration, much like the previous example. This may however be a few seconds behind until it is completed. Should a fatal error occur in a scheduled integration, OIC will stop it but allow you to recover the instance under certain circumstances.
Versioning
Yes! Everything is activated and in production. 2 days later we need to make an update to the integration.
The response is:
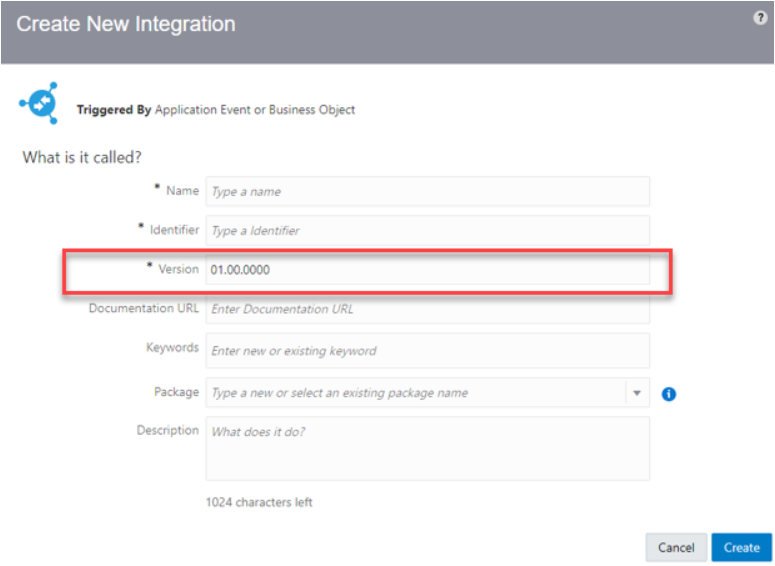
As you remember when you created the Integration you had to specify a version number: 01.00.0000.
To make a new version, you must click on "Create New Version", as shown below.
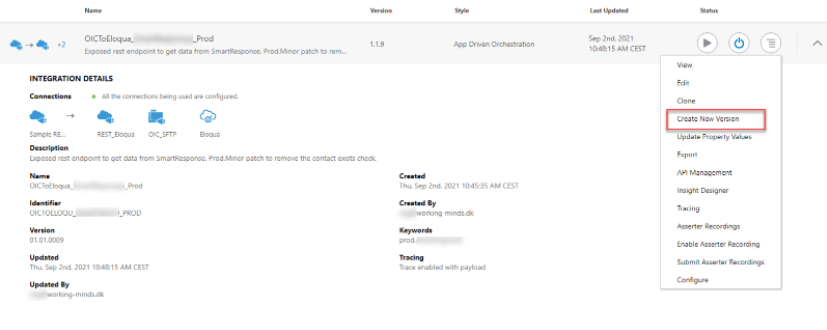
Pressing the Hamburger Menu Button opens additional options, as can be seen on the image. Here we have the option to either clone it or create a new version. In our case we just need to do a minor update in our flow, so a new version is fine.
This will open this menu:
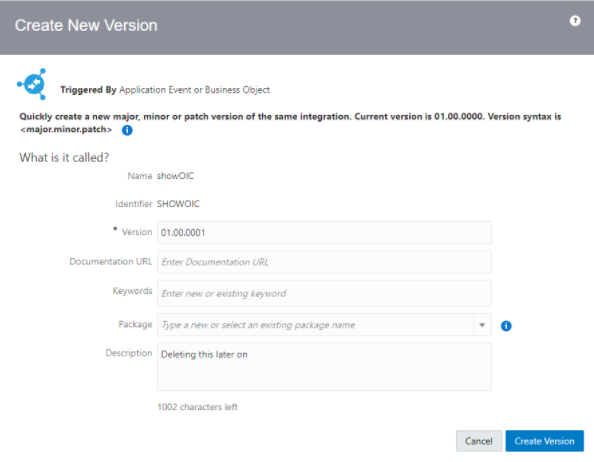
Here we can enter the number version and so on. Because this is a minor update, we can enter "01.00.0001".
When changes are made, you can activate and replace current version, without any downtime.
What have I learned?
Overall Oracle Eloqua has a very flexible REST API and data model. Using Oracle Integration Cloud extends usage of Eloqua (or any platform), and together you have no limits of the tasks that can be done.