In Oracle Responsys you can setup tracking on all your links and analyse this in a report. In any link you can enhance your tracking with conversion. We will cover link tracking in another article and focus on conversion tracking and how to implement and use it.
What is a conversion?
To record conversions, you need your customer to complete a desired action through a link in your email campaign. For example, your email campaign recipient clicks on a tracked link in a campaign and is redirected to your website. A cookie is placed on their computer. When placing an order from your website the order confirmation landing page has a pixel already installed, and conversions are recorded.
How does it work?
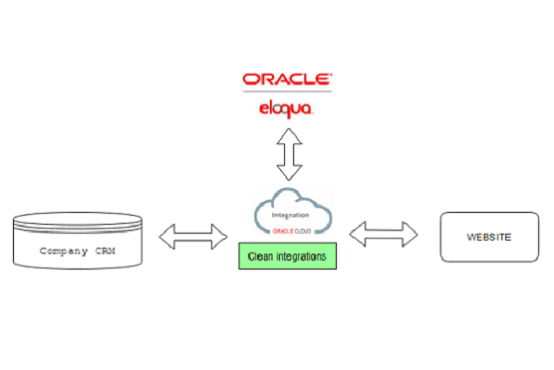
The flowchart below describes the technical setup behind conversion tracking in Responsys:
So, in short, that means that a cookie is saved when the recipient visits your website from a campaign. If this cookie is available when a purchase is made, Responsys will register a conversion.
Luckily you don’t have to know that much about how it works, but simply follow these steps in Oracle Responsys.
Steps for activating conversion tracking in a campaign:
1. Create a campaign in Responsys
2. Enable link tracking and create a link table. Make sure, that all links leading to your website are being tracked. Follow these steps to find Link tracking.
3. Enable conversion tracking for the campaign
4. Open the Campaign URL page for any campaign.
5. Copy the image source code into your order confirmation landing page.
6. Test your conversion tracking campaign by proof launching your campaign or using campaign preview.
Landingpage when clicking above link:
7. Check the live report to see, if the conversion got recorded. Some delay might occur before you can see the conversion here.
Now you have the basic setup, and we have added some extra comments on some details you should be aware of:
#1 Tracking conversions is unique
The URL for tracking conversions is unique for every campaign, but you only need to include the conversion tracking image on the conversion acknowledgement page from one campaign. This is because the attribution information contained in the Responsys cookie gets updated every time the user clicks on a link found in a conversion campaign.
#2 Unique conversions
It is recommended, that you include “theaction=oncetag” in your conversion tag. This stops the tracking after first conversion.
#3 Expiry date
Set the cookie expiry date, e.g. 30 days. The expiry tells the number of days within which the user must complete an action after clicking the link.
#4 Certificate
If your website uses HTTPS protocol, then your conversion tracking should also do so. If you don’t yet have an SSL certificate installed for your Responsys account, then you should proceed in acquiring the certificate first and do it well in advance before the scheduled campaign launch. Adding the SSL certificate can take up to 7-10 working days.
#5 Custom data
You can add custom parameters to the conversion tag to record extra data, that is passed back, when a recipient views a conversion acknowledgment page. This could e.g. be a SKU number for the product, product category, amount spent or transaction ID.
Steps for adding extra parameters to conversion tracking:
1. Embed the additional parameters and the associated values to the conversion URL on the conversion acknowledgement page (via Google Tag Manager or similar tool)
2. The following extra parameters are available as standard:
a. ORDERTOTAL
b. ORDERID (must be unique)
c. NUMITEMS: Number of items in order (optional).
d. CUSTOMERID (optional).
e. TYPE (Requires a custom column to be captured)
Example:
<IMG SRC="http://rsp.ServerName.net/pub/cct?_ri_=X0Gzc2X%3DS%3AzbHS%3ASRCR%3Aq&_ei_&OrderID=OrderID&OrderTotal=OrderTotal&NumItems=NumItems&CUSTOMER_ID=Cust_ID” WIDTH="1" HEIGHT="1">
3. If you’d like to track other parameters, you will have to add them in Account -> Contact event data settings -> Email custom columns
4. After adding the custom columns in the event data settings, you will have to make sure, that you are exporting and importing event feed data for conversions. Add the custom fields to the supplemental tables, that you are importing your conversion data to and edit the import connect job accordingly.
Once these steps are completed and your conversion data is being recorded it is available for usage. You could e.g. record which product categories the recipient has purchased and use this data in retargeting.
Note that the event feed data tables are typically set up to update once a day and usually in the end of the day.
#6 Conversion acknowledgment page
Use Google Tag Manager or similar tool to insert the conversion tracking tag on your website and configure the events, that should trigger the conversion and should signal to Responsys, that a conversion has taken place.
You can have multiple pages or actions, that trigger a conversion.
Merge any custom parameters, that you would like to track associated with the conversion. Remember to take all the necessary actions in Responsys for recording this data to make it available for later use.
Do not link to the acknowledgement page directly from the email campaign. To accurately record a conversion requires, that the conversion acknowledgement page is displayed after the email recipient completes the wanted action.
Ok, so this ends the article, and we hope this can get you started using conversion tracking.
As ways, fell free to follow our company page on LinkedIn at https://www.linkedin.com/company/working-minds-denmark/
If you have any questions about this article or Oracle Responsys in general, fell free to connect to our CEO, Henrik Jochumsen.


